
Nail Art Designs: Ideas, Tools and How to Get the Look at a Salon
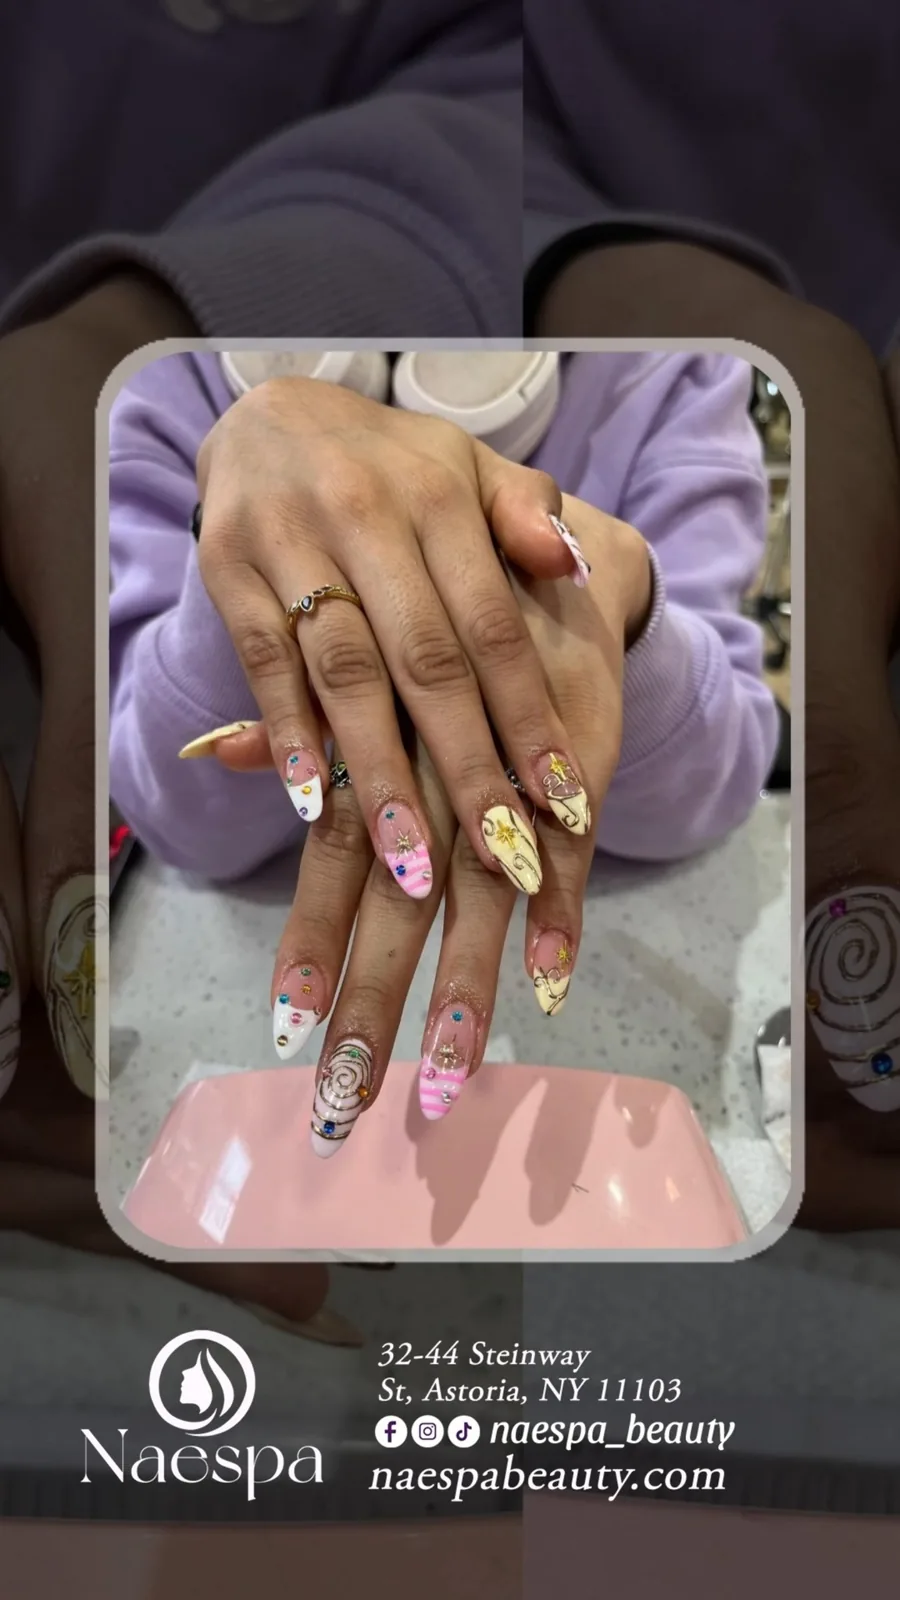
Nail art designs run from a single tiny heart on one finger to a full hand painted set, and most clients in Astoria land somewhere in the middle. The best design is the one that suits your nail length, your daily routine and how often you want to come back.
The direct answer: choose the design by nail length first, then the technique. Short nails hold lines, dots and French edges well, longer shapes carry chrome, ombre and painted scenes, and the right tool, whether a brush or a marker, depends on how fine the detail has to be. Below are the designs we see most, the tools behind them and how to keep them looking good.
Which nail art designs are most popular?
Most requested designs fall into a few families: French and colored French, chrome, ombre and hand painted work. Each one wears differently, so it helps to know what you are signing up for.
French design
A French design is a clean tip, white or colored, on a nude or sheer base. It goes with everything, and it is available as an add on to a gel or Russian manicure. If you want ideas beyond white, our guide to French design nails shows the options.
Chrome
Chrome is a mirror powder over gel. It looks metallic from silver to rose gold and pearl, and it needs a gel base to stay glossy.
Ombre
Ombre blends two shades down the nail. Soft peach to cream and pink to white are the usual picks, and the blend looks best on a nail with a smooth surface.
Hand painted sets
These are the full sets where each nail has its own motif: flowers, lines, tiny faces, marble or abstract swirls. They take longer, which is why we ask for a booking when you want a complete set.
How do I match a design to my nail length?
Short nails suit small, precise art. Long nails suit big canvases. If you pick a design that fights your length, it will look cramped or get lost.
| Nail length | Designs that work | Why |
|---|---|---|
| Short natural | Thin French, dots, single accent nail, tiny line work | Small art stays crisp |
| Medium | Ombre, chrome, floral, colored French | Room for a blend or a motif |
| Long | Hand painted scenes, chrome, deep French, layered art | Large canvas for detail |
If your nails are short and you want ideas that last, our post on simple nail art ideas for short nails is a good place to start. Gel X and soft gel tips take art well, and hard gel tips give strength on long shapes, so the extension you pick affects how the art wears.
How long does nail art last?
Nail art lasts as long as the manicure underneath it. On gel, that is usually two to three weeks, and on acrylic it follows your fill schedule.
Fine line work and 3D pieces are the first things to show wear, because they sit above the surface and catch on things. Flat designs under a sealed top coat can outlast the color itself. If you are deciding between an acrylic set and gel for a detailed design, read how long acrylic nails last between fills before you choose. When you want art with a long lifespan, ask for a strong base and a thorough seal on the free edge.
What are nail art markers and when should you use them?
Nail art markers are pen style tools with a fine tip filled with polish or gel ink. They make thin lines, outlines and small details far easier than a brush when you have no practice.
Technicians use markers for quick outlines, writing, tiny dots and hearts. A brush still wins for flowing curves, blends and flower petals, because it holds more color and gives you variable line width. A good rule: markers for control, brushes for flow. Markers are also useful at home, since the pressure is easy to manage, but they dry out if the cap is left off, so close them every time.
Marker or brush for your design
- Single thin line or outline: marker.
- Dots and small shapes: a dotting tool or marker.
- Flowers, leaves and marble: a thin brush.
- Stripes and long lines: a striping brush.
How to clean nail art brushes
Wipe the brush on a lint free pad right after use, then clean it with the correct solvent, which is gel cleanser for gel and acetone or a brush cleaner for regular polish. Reshape the bristles and let it dry flat.
- Remove excess color on a pad or paper towel without pressing hard.
- Dip the tip in cleanser and wipe it to remove the rest of the pigment.
- Reshape the point with your fingers so it dries to a fine tip.
- Store it with a cap on, flat or bristles up, never resting on the tip.
Never leave a brush soaking, since that loosens the glue at the ferrule and the bristles splay. If you are using a brush for several colors, clean between each shade so the pigment does not mix. At the salon, tools used on clients are sanitized, and our tools are UV sterilized.
How to do nail art at home, step by step
Start with a clean, dry nail, a base coat and one fully cured color layer. Do your design on top, cure or dry it, then seal the whole nail with a top coat.
- Prep: push back cuticles, buff the shine and wipe the nail.
- Base: apply base coat and your color, and cure or dry.
- Design: use a thin brush or marker, building lines in light strokes.
- Seal: cap the free edge with top coat and cure or dry fully.
- Finish: apply cuticle oil once the nail is cool.
If it goes wrong, fix it at once with a small brush and cleanser before sealing. And if you want a design with structure, like 3D flowers or stickers, the salon will have a steadier hand and better tools than most home kits.
Stickers, flowers and 3D designs
Stickers and decals are the fastest nail art medium. They sit on a tacky color layer and get sealed under top coat, so they last as long as the manicure.
Flowers are done with a dotting tool, a thin brush or a gel in a tiny drop, and they work on any length. 3D designs are built with thicker gel or acrylic and cured in layers. They look stunning but catch on hair and sleeves, so keep them to one or two nails if you type all day or work with your hands. Press stickers on gently, trim the edge and seal them well so the corner does not lift.
Tipping and booking nail art
A fair tip reflects the time and skill in the design, and our guide to how much to tip at a nail salon gives a quick way to work it out.
For simple art, walk ins are fine. For a full hand painted set, book ahead so your technician can plan the time. Bring two or three photos, say which parts you like, and mention your nail length and your lifestyle. Pairing art with Gel X can be a good choice, and you can read about it in our guide to Gel X nails. You can see all the options on our nail art designs.
Get nail art at Naespa on Steinway Street
Naespa Nails & Beauty is at 32-44 Steinway St, Astoria, NY 11103. Call (347) 894-6190, or book online for a full set. The last nail appointment is 6pm Monday to Saturday and we are open seven days.
Browse our nail art and Gel X menu, then pick your base: gel manicure, soft gel tips or an acrylic set. Bring your photos and we will find the version that suits your hands.
Questions readers ask
How do I do nail art at home?
Start with a base coat and a fully cured color, add the design with a thin brush or marker, then seal it with top coat. Practice on a swatch first.
How do I use nail art brushes?
Load only a little color on the tip, hold the brush near the end and let the bristles do the work in light strokes. Clean the brush between shades.
How do I do flower nail art?
Place small dots in a circle with a dotting tool or the tip of a brush, then add a center dot in another color. Seal when dry.
How do I use nail art stickers?
Press the sticker on a tacky or freshly colored nail, trim the edges and seal the whole nail with top coat. Sealing the corners stops lifting.
What is the easiest and fastest nail art medium?
Stickers are the fastest, and a marker is the easiest tool for beginners. A simple French tip is also quick and holds up well.
Can I do 3D nail art on every nail?
You can, but 3D pieces catch on hair and clothes. Most people choose one or two accent nails.